Easy as Hummus

Easy as Hummus

This is a recipe I learned while at the Gawler Foundation. All meals were vegan and nutrient dense, aimed at activating the bodies natural healing mechanisms. I had to experiment a lot to find recipes that would keep me satisfied both in terms of hunger and flavour. This low GI snack provides slow-burning energy, helping to monitor appetite and balance your blood sugar so you don’t crash and burn by 3pm!

Note to tummy: Soaking info below*

Legumes can be extremely hard to digest due to naturally occurring nutritional inhibitors and toxic substances found in the beans (and nuts). These are Mr. Beans personal defense mechanism but with just a bit of effort we can eliminate these toxins so the beans are left with all the good stuff!


You will need a food processor for this recipe.

  • 400g Soaked chickpeas. If you are reading this thinking “Damn, wish you told me that yesterday!” Don’t panic, you can use tinned. Just rinse them well and use organic if you can.
  • 1 Garlic clove, diced
  • 1-2 Tbls Cold-pressed olive oil
  • 1 Tbls Tahini
  • Juice of 1 small lemon
  • 1 tsp Smoked Paprika
  • 1/2 tsp Cumin
  • 1 tsp Salt or to taste (Gawler option: omit or use yeast flakes)
  • A little water


Preparation:

1. Place chickpeas and garlic in food processor and whiz briefly to combine.

2. Add olive oil, lemon juice (start with 1/2 and add more to taste), spices and salt. Process to reach desired consistency (I like mine a little chunky). If it seems too dry add a little water at a time until it’s how you like. Season to taste.

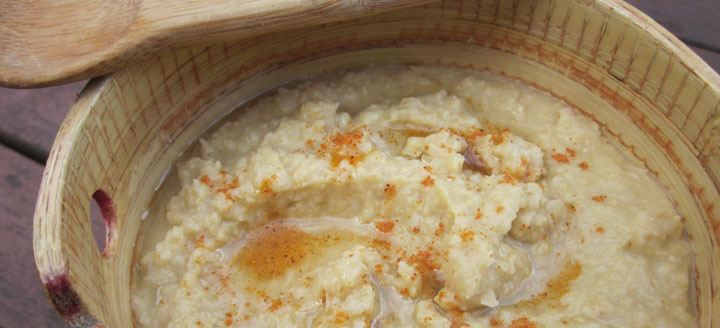
3. To serve drizzle with extra olive oil and sprinkle with a pinch of paprika. Enjoy with fresh vegies, on crackers or…. For something a little fancy heat in the oven (pre-heated at 180 C) for 10 minutes until warm. Serve strait away with crusty bread or as a mash under roast chicken breast! Yummm-ville!

*Soak 2 cups of dried beans overnight (~12 hours) in a large pot of water and a pinch of salt. If you can get your hands on some seaweed (kombu is great) this will further aid digestion. However, if you can’t get seaweed just use a splosh of vinegar instead. Soak until fully hydrated. Sometimes with larger beans like chickpeas you might need to go a little longer (up to 48 hours) just use your intuition…or alternatively you’ll get hungry enough to just go for it and dive in!
Paleo Fennel Seed Bread

Paleo Fennel Seed Bread

I love having a fall back paleo bread for those lazy Sunday’s when all I want is a big plate of poachies on toast. Let’s face it, an eggy breakie is just not the same without something to mop up the yolk!

The fennel in this bread gives it a warming component that is great for digestion.


  • 1 cup almond meal
  • ¾ cup flax meal (also known as linseed meal)
  • pinch of salt
  • ½ tsp baking soda
  • ½ tsp baking powder
  • 3 free range eggs, at room temperature
  • 2 Tbls coconut oil, melted
  • ¼ cup water
  • 1 tsp honey or maple syrup
  • 1-2 Tbls whole fennel seeds


Preparation

1. Preheat over at 180C (350 F). Grease a 23 x 13 cm loaf tin or French stick tin as seen below. Line with baking paper.

2. In a large bowl combine almond meal, flax meal, salt, baking powder, baking soda and fennel seeds.

3. Make a well in the center and add eggs, water and honey. Add the melted coconut oil last as it will turn solid on contact with the cool mix. Whisk together immediately to allow even distribution.

4. Pour into desired loaf tin.

– Regular 23 x 13 cm loaf tin: bake for 30-35 minutes – using loaf tin.

– French stick loaf tin: this batter will make 2 medium loaves or one longer loaf and bake for 25 minutes.

5. Cool on a wire rack before serving.

Serving suggestions: The fennel in this bread gives it a savoury flavour that makes it great with soup (try my carrot, ginger & coconut soup) or as a sandwich.


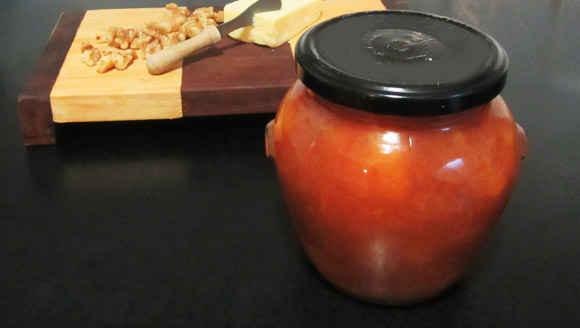
It’s My Jam! Homemade Nectarine Jam, to be exact.

Nectarine Jam

NOTE: This recipe can be made with any other stone fruit.

I was lucky enough to score myself a giant 2kg bag of beautifully juicy nectarines recently and have been experimenting with all kinds of recipes since. Here is a simple yet salivatingly delicious jam recipe that can be used simply as that; on toast for breakie or with a side of Greek yogurt for a light desert…I enjoy just spooning it out from the jar, but then, some would say I lack all self control when it comes to sweet things!

Health Benefits of Nectarines:

Nectarines are rich in vitamins and minerals and very low in calories, so they are a great little snack to keep you going between meals. As with any orange coloured fruit or veg they contain high levels of beta carotene, which helps keep your vitamin A levels in check and benefits bone, reproductive and eye health (think about carrots helping you see in the dark)! Vitamin A also builds and maintains healthy skin, teeth, bone, tissue, and mucous membranes. They are also rich in vitamin C and lutein for a great dose of antioxidants. This can help improve immune function and protect against oxidative damage from pollution, stress and chemicals, which in turn can lead to chronic diseases, such as cancer.


Approximatley 9 (~850 g) nectarines or any stone fruit, thickly chopped and stones removed. Do not peel as the peel with provide the pectin to help the jam set. Please note that if stone fruit are not in season you may use tinned but you will have to add extra pectin as these are usually peeled.

150 – 200 mls raw honey, adjust to taste as some fruits may be sweeter than others. Vegans can replace with sweetener of choice.

1 vanilla pod, scraped and cut in 2 (optional use of other flavourings such as cinnamon, star anise or your fave spices!)

1/2  a lemon. Reserve juice and some peel as this contains extra pectin to help the jam set.

1 splosh brandy (about 1-2 Tbls depending on taste). Optional.


Preparation

  1. Sterilize 1 large or 2 medium jars. I simply drench them in boiling water and allow them to air dry while I cook away.
  2. In a medium-large saucepan combine nectarines, 150 grams of honey, vanilla seeds and pod (or additional flavourings if adding), lemon juice, peel and brandy.
  3. Simmer gently for 30 minutes, tasting as you go along and adding more honey if needed.
  4. I’m rustic (hem hem, lazy) so I leave the vanilla pod and lemon peel in but you may scoop them out here if you are worried about chomping into them later. You will see them as you spread the jam so it is easy enough to remove as you go.
  5. Transfer to sterilized jars. Allow to cool completely and store in the refrigerator.

Serving suggestions: Serve on toast for breakie, with crackers and sharp cheese as part of a platter (yum!) or on top of Greek yogurt.

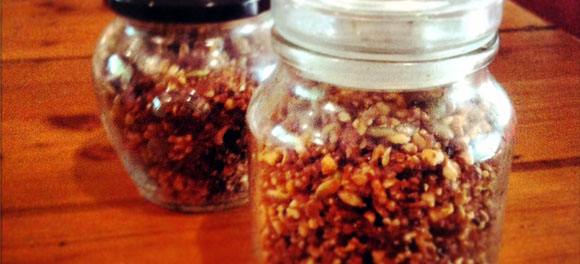
Paleo Granola

Paleo Granola – oh. my. god. yes!

Be warned, this is dangerously addictive! You will end up eating it by the handful from the jar.

Serves 12

  • 2 cups your favorite raw nuts, roughly crushed
  • 3/4 cup dried fruit (I’m loving craizens at the mo)!
  • 1/2 cup pepitas (pumpkin seeds)
  • 1/2 cup LSA meal
  • 1 cup desiccated coconut
  • 2 Tbls chia seeds
  • 1 tsp cinnamon
  • 1/2 cup coconut oil
  • 4 Tbls raw honey
  • 2 tsp vanilla extract

Preparation:

Preheat over to 170 degree C.

1. In a large bowel combine the crushed nuts, dry fruit, pepitas, LSA meal,  desiccated coconut, chia seeds & cinnamon.

2. In a small saucepan melt coconut oil and honey. Remove from the heat and add the vanilla extract.

3. Poor wet mixture over dry and mix to coat.

4. Spread on a large oven tray and bake for 30 minutes stirring every 10 minutes.

5. Cool and serve with coconut milk and fresh fruit. Yuuuum!


Storage: I like to store this baby in a large jar in the fridge to ensure it stays fresh as long as possible. Make sure you completely cool it first or it will sweat. It will last you ~1 months in the fridge.